Wednesday, January 29, 2014

Extra Moist, Sky-High Sweet Cornbread

I was so incredibly happy with how this recipe turned out.  It comes out very tall and impressive.  The texture is superb.  Honestly, its better than eating cake- and that's saying something.
Ingredients
  • 1 c. cornmeal
  • 1 c. all-purpose flour (I used unbleached organic to help me feel better for using white flour)
  • 2 c. white whole wheat flour
  • 2/3 c. Splenda baking mix
  • 2 Tablespoons baking powder
  • 1 teaspoon salt
  • Dashes of cayenne & cinnamon (to kick it up a [little] notch!)
  • ⅔ cup coconut oil
  • 5 Tablespoon melted butter
  • 2 Tablespoons honey
  • 1 egg, beaten
  • 3/4 c liquid egg whites (or 3 egg whites)
  • 2 cups whole milk (yes, I know, its bad-- but its the secret ingredient!)
Instructions
  1. Preheat oven to 350 degrees and grease a 9×13 inch baking dish with additional coconut oil.
  2. In a large mixing bowl, whisk together the cornmeal, flour, sugar, baking powder, and salt.
  3. In a small bowl, microwave the coconut oil & butter for a few seconds until melted
  4. Use a spatula and pour into flour mixture
  5. Add the honey, beaten egg, egg whites, and milk, and stir just until moistened.
  6. Pour the batter into the greased baking dish and bake in 350 degree oven for 45-60 minutes. Watch the cornbread towards the end, you want it to be turning golden and starting to show some cracks.  
          It will be very moist, so don't think its not done cooking, just because it feels so dense and moist compared to most cornbreads.  Bake until a tester comes out clean.  It took mine nearly an hour before I was satisfied with its doneness.

        No joke, this recipe is a keeper.


Adapted (and changed significantly) from a recipe on the blog Daily Dish.

Lemon Poppyseed Soda Bread (& a salad)

So a while back I was at a bulk natural foods store, the kind where they just have the products in nondescript 1/2 pound and 1 pound clear plastic bags.  In the odds & ends section, where you never really know what they are gonna have bagged up, I found a whole big bag of chia seeds (one of my favorites!) for super cheap!  I couldn't believe my luck!  I hurried up and purchased them before the store could decide they had been priced so low by mistake-- those litter buggers are pricey!

 Then I got home I realized I'd just bought a pound of poppyseeds.

(sigh)

In the spirit of my Irishness and because today was a snow and I'm just looking for anything to celebrate at this point in the dreariness of winter, I decided to put a twist on good old Irish Soda Bread.  Secretly, this was all inspired by the lonely 3/4 cup of buttermilk I had in my fridge, just begging to be used.  I made pancakes for Sunday breakfast, and I hate to see good buttermilk (or anything, for that matter --poppyseeds included-- go to waste).

I based my clear-the-cupboards creation (very) loosely on Ina Garten's Soda Bread recipe--

Ingredients
 

~2 cups white whole wheat flour  (in retrospect, it would have tasted better if I used 1/2 regular white pastry dough.  Unfortunately, white flour is just not my style outside of my own birthday cake.)
~1/2 teaspoon baking soda  --> I've always thought something called "Soda Bread" really ought to have more baking soda than that!

~3/4 teaspoons kosher salt

 ~2 tablespoons (1/2 stick) cold unsalted butter, diced into tiny pieces


~3/4 cups cold buttermilk, well-shaken

~1 egg white, lightly beaten
~Juice & grated orange zest from 2 lemons

~3 tablespoons honey


Directions

Preheat the oven to 375 degrees F. Line a sheet pan with parchment paper or foil & rub down the center with coconut oil.

Combine the flour, baking soda, and salt in the bowl and whisk together. Add the butter and mix with a fork, pastry cutter, and/or your fingers until the butter is mixed into the flour in little split pea-sized pieces.

With a fork, lightly beat the buttermilk, egg, and orange zest together in a measuring cup.  Slowly add the buttermilk mixture to the flour mixture with a spatula. 


 My consistency was normal enough that I skipped the whole usual "roll out on floured board" situation.  I just plopped it right onto the prepared sheet.  You can gently make score marks on the top if you're feeling fancy.

Bake for 30 to 45 minutes, or until a cake tester comes out clean. According to Ina, when you tap the loaf, it should have a hollow sound.  But I go for golden brownness myself to determine when to pull the plug.

Cool on a baking rack. Serve warm or at room temperature-- mine was good in a bowl drizzled with kefir and honey.

~~~~

Continuing with my impossible task of using a pound of poppy seeds before I die, I also made this nice little salad...

INGREDIENTS

-2 Granny Smith apples, cut into long, thin slices
-2 heads of radicchio,  roughly chopped
-2 T crumbled fat free feta cheese

-1 lemon, zested & juiced
-1 leftover jar of marinated artichoke hearts (all the hearts were gone, I was just using the jar for mixing and the residual marinade as a dressing base.  You can also just use from water, oil, and vinegar + mild spices of your choice)
-Splash of extra apple cider vinegar
-1-2 T Splenda making mix
-1-2 T poppy seeds
-Salt & pepper


DIRECTIONS 

The main ingredients--green apples, radicchio, lemon-- are all bitter.  So I made a nice sweet dressing to go over the top and temper it.  Shake together all the dressing ingredients in a jar, to taste.  It should be sweet.  Drizzle just enough on the salad and gently mix together.

I brought mine to work for lunch in a tupperware lined with parchment.  Even though it was pre-dressed, it held up very well.  Not wilty at all.  Yum!

Thursday, August 15, 2013

Chilled Canteloupe Soup

I have always been suspicious of cold soups...just doesn't seem right...but during the heat wave of this July, I took a crack at a chilled soup, made with seasonal canteloupe and I was pretty impressed with myself!

It was so simple too!

Ingredients:
-1 medium, ripe canteloupe
-2 or 3 cups plain sparkling water
-8 thin slices of prosciutto
-cracked white pepper
-chopped basil to garnish (optional)

Directions:

-Cube the melon and put the cubes in a food processor in batches until smooth

-Pour the melon puree into a large tupperware or bowl, gently mix in the sparkling water

-Crisp the prosciutto in a pan and crumble over the soup in each bowl, right before serving

-Garnish with crushed white pepper to taste & perhaps a pinch of chopped basil


Serves 4, oh so refreshingly!

Sunday, April 7, 2013

Slim Enchiladas

I had a lot of fun making these enchiladas, and they happily fed me all week-- LOTS of great flavor!

These are "regular" enough to smell/look/feel/taste like enchiladas, but they offer so much more- the pepperiness from the arugula, the heartiness from the occassional mushroom bit, the smokey kick from the chipotle, and the slow-roasted chicken all really came together to make for a great dish...if I do say so myself :)

The recipe is wordy, but its really not difficult.


-->
Slim Chicken Enchiladas with Salsa Verde & Chipotle Sauce

INGREDIENTS
4 small sweet peppers, diced
½ red onion, diced
1 lime, chopped & wrapped in cheese cloth
½ c diced mushrooms (I like baby bellas best)
Generous handful of baby arugula, if desired, you can chop it up
1 can rinsed black beans (reduced sodium is best)
2 uncooked organic chicken breasts
1 small can diced green chiles
½ c water

½ c plain fat free Greek yogurt
1 tsp each cumin & salt & pepper

16 small corn tortillas

1 c (or more) salsa verde or green taco sauce (Wegman's roasted tomatillo sauce is the BEST!)
2T chipotle sauce
¼ c shredded Parmesan cheese
Fresh cilantro


DIRECTIONS
Place the following in a Crock Pot & cook on HIGH for 3 hours

            4 small sweet peppers, diced
            ½ red onion, diced
            1 lime, chopped & wrapped in cheese cloth
            ½ c diced mushrooms
            Generous handful of baby arugula
            1 can rinsed black beans
            2 uncooked organic chicken breasts
            1 small can diced green chiles
            ½ c water (swish in empty chile can to get the rest of the goodness out)

Discard the lime.  Use 2 forks to shred the chicken and combine ingredients. 

Mix in the following:
            ½ c plain fat free Greek yogurt
            1 tsp each cumin & salt & pepper, to taste

Warm tortillas in batches of about 4 in the microwave for ~30 seconds, between damp paper towels.  You are warming them in batches so they won’t cool down by the time you get around to rolling them up, obviously.

            16 small corn tortillas, warmed in batches

I covered my pan with tin foil because I am averse to cleaning pots, but do whatever you want.

Use a ¼ c measuring cup to spoon ~ ¼ c filling into a warm tortilla, wrap it up, and place the seam-side of the tortilla down into the pan.  Be aware that there will probably be excess liquid in the chicken mixture, so try to be draining it as you scoop out each ¼ cup.  Fit the rolled tortillas tightly in the dish.  I squeezed in 16, using 2 pans of different sizes, but I think 16 would be about right for a standard 9x13 pan (5 rows of 3 + a bonus somewhere)

Cover with green salsa and spoon a little chipotle sauce over each tortilla roll.  Sprinkle with cheese.

            1 c (or more) salsa verde or green taco sauce
            2T chipotle sauce
            ¼ c shredded parmesan cheese
Cover loosely with foil and bake at 350 for around 30 mins, until you see some bubbling juices & the cheese is melted completely.

Serve with fresh cilantro!

The beauty of this recipe is the unusual amount of veggies and the high amount of protein even though only 2 chicken breasts are used.  Supplementing the meat with beans & yogurt means less saturated fat and less animals dying (if you’re not too into that) and still getting 8 servings with a substantial amount of wholesome protein.  ¡Qué bueno!

Also, I'm a believer of only adding cheese ON TOP because it takes A LOT of cheese mixed inside of a dish for it to even be noticeable, so why waste cheese and why waste calories?  This is also my philosophy on omlettes.  Putting it on top makes it easier to taste while using less.  


NUTRITION INFORMATION
According to my calculations at Livestrong.com/myplate

For 2 enchiladas (recipe makes 16 enchiladas, ie, 8 servings total)

218 Calories
2.4g Total Fat
7g Fiber
14.5g Protein

That’s light enough to have 2 servings if you wanna!  If you do, that’s about 14 GRAMS OF FIBER & 29 GRAMS OF PROTEIN! Whoa!  Winner.

Sesame Street Fruit & Veggie Platters

I'm a big fan of healthy eating.

And I'm a REALLY big fan of engaging kids in healthy eating!

Which explains my love of this season's Biggest Loser (challenging America to fight childhood obesity), my support of Michelle Obama & her Let's Move! campaign for kids, AND my recent gift to my little baby niece on the way:

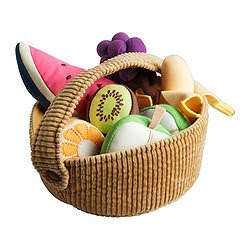
 Plush fruit & veggie baskets from IKEA- love!


 So when I saw these platters posted by the local schwanky health club in town that I am currently saving my pennies to become a member of...

 I had to share them.  No recipe required, I think the photo speaks for itself.

Cookie Monster:
     Blueberries, blackberries

Elmo:
     Strawberries, blackberries, clementine 

Oscar the Grouch:
     Broccoli, olives, bell pepper

Big Bird:
      Pineapple, mango, strawberry

     All with yogurt dip in shallow dishes + blueberries or blackberries for eyes.


Too cute!

Thanks to the Sporting Club at the Bellevue for the inspiration!

Sunday, March 24, 2013

Unique, High-Protein Zucchini Lasagna

-->
This recipe was inspired by a conversation I eavesdropped into while riding on the train to work last week.  A very hip-looking man was describing his urban garden and things that he does with his zucchini crop when they start growing like crazy.  Intrigued, I looked into zucchini lasagna recipes and, as always, added plenty of twists to make it uniquely my own.

One tip I will share is that in the various components of this recipe, be sure to go light on the salt because there will be plenty of remaining salt on the zucchini with the way I instruct you to prepare it.

I made this in a high-walled 9x9 pan, like a brownie pan, and it made 9 good-sized servings about 3x3 inches each and 1 ½ -2 inches tall.


INGREDIENTS:

-4 small zucchini, thinly sliced length-wise with a mandolin

-2T olive oil
-½ yellow onion, diced
-6 cloves garlic, minced
-½ lb ground lean turkey (1/2 a regular pack from the store)
-23oz can tomato sauce with basil (or add fresh basil, which is even better)- NOT ready made pasta sauce, just regular tomato sauce in a can with NO sugar in it
-16 oz can (regular-sized can) plain fire-roasted diced tomatoes

-1 c low fat cottage cheese
-¾ pack of black tofu, minced
-1 c cremini mushrooms, diced in a food processor, or thinly sliced with a mandolin
-Oregano, salt & pepper to taste (go easy on the salt)

-2 oz fresh mozzarella cheese, thinly sliced

DIRECTIONS:

         Zucchini Noodles~
Use a mandolin or veggie peeler to slice zucchini the long way, so you have long, thin strips of zucchini.  You can choose to discard the pieces that are mostly skin if you prefer.  Layer the zucchini on a large platter and sprinkle with sea salt, which will absorb excess moisture.  After about 30 minutes, use paper towels to press accumulated water and excess salt off of the zucchini.  While you are waiting the 30 minutes, you can prepare the sauce.


         Meat Sauce~
Drizzle the olive oil into a large pot or dutch oven and allow olive oil to heat to medium.  Add onions and soften.  Add garlic and cook until soft, stirring regularly.  Add the ground turkey and sautee until mostly cooked.  Add the cans of tomatoes and use a wooden spoon to get the browned bits off the bottom and incorporated into the sauce.  Season to taste- I always add crushed red pepper, loads of black pepper, basil, and a tiny hint of cumin to tomato sauce.  When combined, cover and cook on low, stirring occasionally.  It really only needs to cook until everything is warmed through and well-combined. (*See NOTE below- I reserved 2 cups of meat sauce when I made this dish!)

         Cheesey Layer~
As you let the sauce cook, work on the cheesey layer.  In a mixing bowl, combine the cottage cheese, tofu, mushrooms, and seasonings until very well combined.

Also thinly slice the fresh mozzarella.


         Put it all together~

Prepare the 9x9 pan however you prefer, I sprayed it with a little more olive oil.  Set the oven to 375.

Note that there will be 3 layers of zucchini, 2 layers of the sauce, 2 layers of the cheese, and 1 layer mozzarella on top.

1) Layer 1/3 of the zucchini strips into the bottom of the pan, slightly overlapping them, having them all lining up in the same direction.

2) Ladel 1/2 of the meat sauce over top, smoothing it out with the back of the ladel.

3) Add ½ of the cheesy mixture over the sauce, making it as smooth as possible.

4) Layer another 1/3 of the zucchini strips, as before.

5) Ladel on the rest of the sauce, smoothly.

6) Add the rest of the cheesy mixture, as smoothly as possible.

7) Layer the rest of the zucchini strips.

8) Finish with the mozzarella slices, evenly distributing them over top.


Bake for about 30 minutes.  If the mozzarella is looking melted, loosely put a layer of foil on top.  Cook until the sauce is bubbling up, about 50 minutes.  I recommend putting a foil-lined baking sheet on the rack beneath the lasagna in the oven, to catch any sauce spill-over.

Allow to cool slightly, use a sharp knife to cut into 9 pieces, and enjoy your healthy dinner than looks like the real thing!

It’s gluten free, if you’re into that, includes >2 servings of vegetables per piece, and is incredibly high in protein while not using that much meat (only 2 servings of turkey for a 9-serving dish!)

Here’s the nutrition info, compliments of the MyRecipes calculator on livestrong.com~

177 calories
5g fat (1 saturated)
4g fiber
16g protein
16g carbs


**NOTE: Because I make up all of my own recipes, sometimes the quantities aren't perfect.  When I made this dish, I had about 2 cups of meat sauce left over that I DID NOT use in the final product.  I saved this for topping spaghetti squash with- another excellent veggie/pasta swap!

Friday, January 11, 2013

Stuffed Bell Peppers- easier than you think!

What does one do when Wegmans is having a sale on big bags of beautiful bell peppers?  Stuff them!

I reviewed a few recipes for stuffed peppers on foodnetwork.com, and combined some of their insights to make my own (superior) recipe.  Healthy and delicious as always :)


INGREDIENTS:


1 c uncooked brown wild rice
2c low sodium vegetable stock

½ pound lean ground turkey
½ c chopped red onion
3 cloves garlic, chopped
1 large handful of fresh baby spinach, chopped

black pepper to taste
sea salt to taste- remember, you’re gonna be eating an entire bell pepper here, so make sure you use  
       enough salt
pinch of cayenne powder
2T chopped fresh oregano

4 bell peppers, any color

3T shredded Parmesan cheese
3T plain Panko breadcrumbs- whole wheat, if available


Honestly, this recipe tastes best when made with chorizo instead of ground turkey…but it's still pretty close to New Years, so we’re all still trying, right?


DIRECTIONS:

Boil the vegetable stock or broth & cook the rice in it; cover & set aside.

Chop everything that needs to be chopped.

Wash the peppers and cut out the tops.  You will want to remove the seeds and the white stem things inside.  Discard the seed pod and the stem, but if there is pepper flesh surrounding the stem that you've cut out, salvage it and chop it up too for adding in with the garlic and onion. 

Stand up the peppers in a pot that is just big enough to fit them all.  You may want to slightly cut the bottoms of the peppers if they are lopsided so that they stand up straight, but don't cut deep enough to make a hole in the pepper!

Preheat the oven to 400

Brown the turkey over medium heat with salt, pepper & cayenne.  When turkey is nearly cooked, add the garlic/onion/pepper tops and cook until the veggies are soft and turkey is fully cooked.  Turn heat to LOW (or OFF if your rice is still hot) and add the spinach & oregano and any other spices you want to add. 

Add the rice and mix everything all together.  Sample to make sure you have seasoned it enough- my favorite part :D

Spoon it all into the 4 bell peppers.

In a little bowl, combine the bread crumbs, shredded cheese, and a little more crushed pepper (I prefer Rainbow Peppercorns) and spoon it over the now-stuffed bell peppers.

Carefully add about 1/2 to 1 inch of water to the bottom of the pot.   

Bake in oven for 30 minutes.  If the topping is browning too quickly, cover with foil.

Serve hot.
I really like this method- I think blanching & refreshing the peppers beforehand is kind of overkill.  Plus, baking them this way, instead of cooking them swimming in sauce, really helps the peppers maintain their structural integrity, shape, color (vitamins!), and gives the dish a fresher taste.  And, of course, eliminating a needless sauce logically eliminated needless calories and needless kitchen prep- double bonus!


From our friends at livestrong.com where I crunched the numbers, each stuffed pepper contains the following:

Calories 283
Total Fat 5.8g
            Saturated Fat 1.7g
Dietary Fiber 6.5g
Sugars 1.5
Protein 21.25 (whoa!)